Keep the people of Japan and of all over the world with family and friends in Japan. My friend's family is directly affected. If you can, check out their story and help in anyway you can.
http://www.facebook.com/#!/pages/Breun-Family-Japenese-Relief-Fund/186239164752348
Monday, March 14, 2011
Friday, March 11, 2011
Spring is in the air!
'Tis the time to open the windows and clear out some germies. I know that yesterday and today it was so great to hear the kids playing outside. The dogs are running and chasing each other. It's great. However, we are in Chicago...don't gt too excited!
You can start checking out the libaries for new story times. These usually begin about mid to late March. Many libraries also have the free museum passes. You can take a family of 4 to the shedd for the cost of parking! Check into that. When the ground dries, take a spring "ISPY" walk. Look for blossoms, specific colors, birds, squirrels etc. Go home and have them draw their favorite part.
Let's pray for people in Japan. It's devistating. I know I have a friend who has family there and has not yet heard anything, so keep everyone in your prayers and thoughts.
Tanya
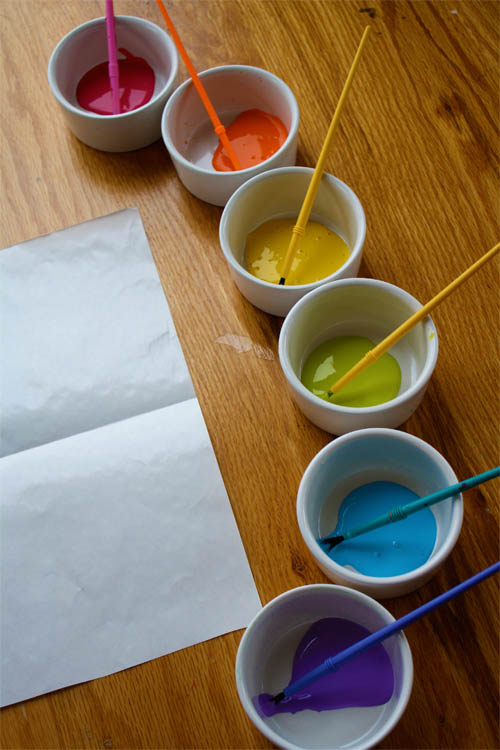
A rainbow to kick off spring!
There seems to be no better time of the year than around St. Patrick’s Day to paint a rainbow! These fun little prints amaze kids! They won’t believe half a rainbow can be turned into a whole rainbow!
 We painted on the shiny side of freezer paper. Cut what ever size you like.
 Fold the freezer paper in half. On one side of the paper paint half a rainbow.
 Fold paper in half and lightly press. Don’t slide hands, just press. With one finger you can slide along each individual color of the rainbow if you like.
 Open paper. We then added a touch of glitter to make our rainbows sparkle! Dip a dry brush into DecoArt Glamour Dust.
 This glitter is the best. It is so fine that in adheres really great to the paint. My daughter said, “I am all about this glitter!”
Tap a finger or pencil on the handle of the paintbrush and your rainbow will receive a beautiful sprinkle of glitter!
 May there be a big pot of gold at the end of your rainbow!
Set out a rainbow of acrylic paint.
 We painted on the shiny side of freezer paper. Cut what ever size you like.
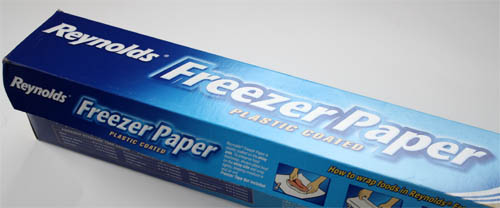 Fold the freezer paper in half. On one side of the paper paint half a rainbow.
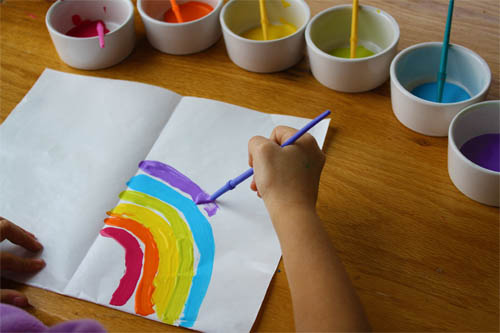 Fold paper in half and lightly press. Don’t slide hands, just press. With one finger you can slide along each individual color of the rainbow if you like.
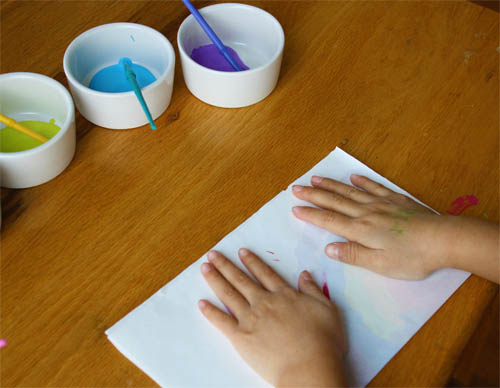 Open paper. We then added a touch of glitter to make our rainbows sparkle! Dip a dry brush into DecoArt Glamour Dust.
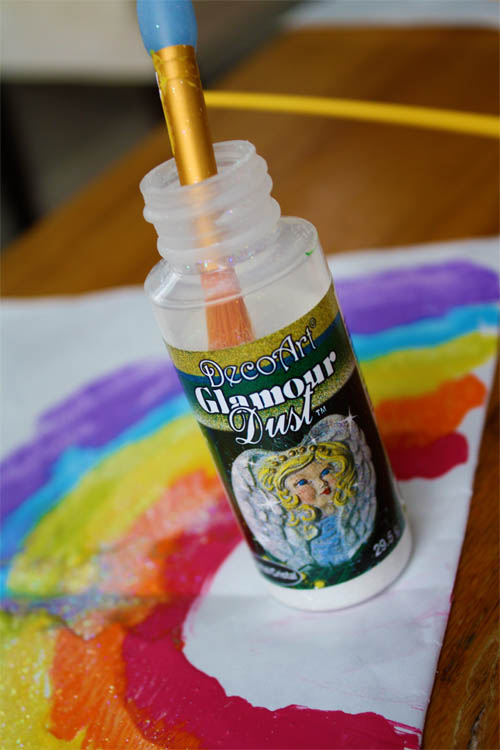 This glitter is the best. It is so fine that in adheres really great to the paint. My daughter said, “I am all about this glitter!”
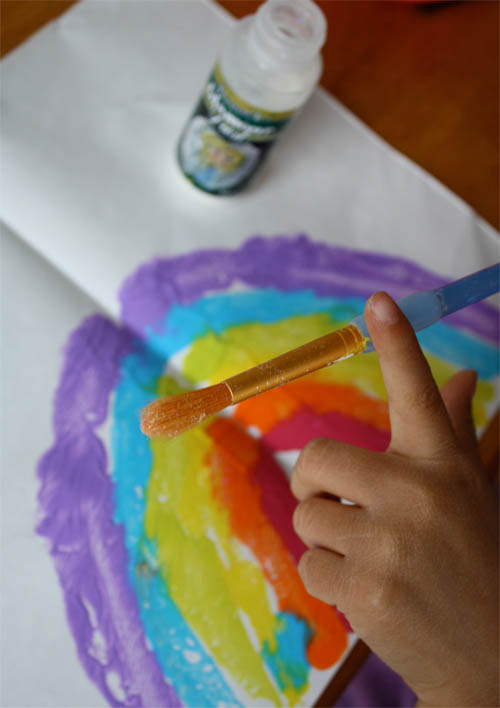 May there be a big pot of gold at the end of your rainbow!
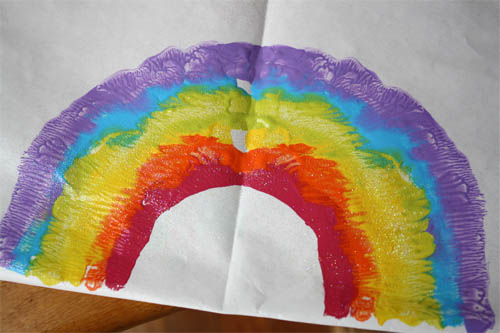
Wednesday, March 9, 2011
add a little something to the paint!
If you are at home painting with your child, add some sand or salt to the paint mix. This will give a different texture not only to the painting itself, but they will feel it with their hands and or with their painting utensil. Speaking of utensils...think of the different things you can use to paint with. How about a toothbrush, a feather, toothpick, spoon, squished up small towel held by a clothes pin. Just some fun thoughts on these rainy days!
Keep having fun.
Tanya
Keep having fun.
Tanya
Tuesday, March 8, 2011
Wishing my Academy families and friends a Blessed Lenten Season
Stay tuned for engaging Easter ideas.
March comes in like a LION!
Day one went really well. I love the schedule. I miss my other kiddos lots and lots, but I will be in touch. Here is a cute idea I have done and came across for this lovely time of year. Try it this weekend!


What you will need

- Construction Paper
- Paper plate
- Scissors
- Glue
- Face Paint (optional)
- Rubber bands (optional)
- Puncher (optional)
-
-
What to do:
-
Step 1: Let the child cut strips of the construction paper. Each child would need at least two colors to make the basic pattern. In our case, we cut out a variety of colors and let them choose the two colors they wanted

-
Step 2: Cut out the center of the paper plate. This is where they would insert their faces later on-
Step 3: You could also include one hole on each side of the paperplate where you could insert the rubber band/elastics later on. We opted not to use them though ‘coz the circular shape of the paperplate gets deformed for the smaller faces.
-
Step 4: Let the kids put glue all around the paperplate-
Step 5: Let them select two colors to use for your pattern and start making the pattern. “red, blue, red, blue…”

-
Step 6: Once done, wait for it to dry-
Step 7: Use a pencil or edge of the scissors to curl the paper for the added effect


-
Step 8: If you have some face paint, you could paint the kid’s noses to make them look more like lions!Just make sure you tell them how to remove it so they don’t get grossed out.
Subscribe to:
Posts (Atom)